Update: Apple will now let you submit apps built by Flash CS5 into the App Store!
1. Download Adobe Flash Professional CS5. You can either buy it for $699 or get the free 30 day trial by clicking here.
2. Click on File then click on New. Select the option for iPhone OS and click OK.

3. Now there should be a blank space for you to make your flash app. But before you can do this, you must sign your app.
If you are not an official Apple developer, you will not be able to send apps to the App Store, but you can still send them to Cydia. If you are not an Apple developer, download this p12 certificate and unzip it.
5. Now in Flash CS5, click on File, iPhone OS Settings, and Deployment. For the Certificate box, browse for the p12.p12 file. Enter 1234 for the password and browse for the mobileprovision.mobileprovision for the Provisioning File.
<div class=">

7. Click OK. Now start developing your iPhone app in flash like any other game. Beginner flash developers may want to watch this video:
Once you're done creating your app, go once again to File, iPhone OS Settings, and Deployment. Then click on Publish at the bottom. This process will take a few moments. Flash CS5 will create an .IPA file of your application which will show up in the default location of My Documents.
9. Now if you had a legitimate Certificate from Step 4, you can submit your app to Apple for reviewing.
If you downloaded the Certificate from Step 4, go into Cydia (you must have a jailbroken device, find out how to jailbreak here). Tap on Manage, Sources, Edit, Add. Type in http://cydia.hackulo.us.
10. Go into the Search in Cydia. Type in AppSync for the current OS on your device. Install it.
11. Now drop the .IPA file from your My Documents folder into iTunes. Click the Sync button and let iTunes put the app onto your device.
12. Test out your app, if everything is working correctly, using WinSCP (Windows) or Cyberduck (Mac) go into the /Applications/ folder on your device and find the folder of your app. Copy that folder onto your desktop, zip it up, and send it to a repository like ModMyi or BigBoss to host it so others may download it.
Source : ipodtoucher55
Porting an Application to iPhone Using Flash CS5
Last week saw a very significant development in the relationship between Apple and Adobe. Flash is back in the iPhone picture. In this tutorial, I will show you how to convert an exisiting Flash movie to an iPhone application using Flash Professional CS5.Step 1: Choose a Flash App
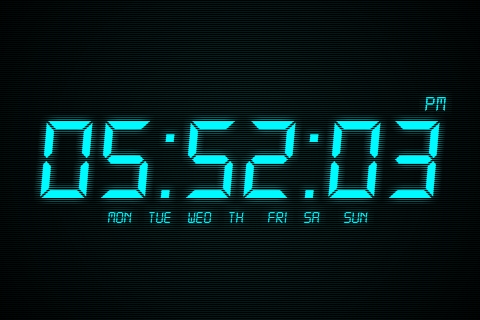
The first thing you need to do is select the application that you want to port. In this example we’ll be working with the Digital Clock app we created in another ActiveTuts+ tutorial.
Step 2: Create a new iPhone OS File
Launch Flash CS5 and create a new iPhone OS Document.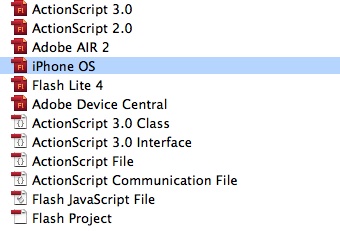
Step 3: Landscape
As you can see, the default stage size is 320×480 px, which is the iPhone full screen resolution in portrait mode (this is holding the iPhone vertically).
Set the stage size to 480×320 px and continue with the next step, we’ll see how to set the app to Landscape mode in step 10.

Step 4: Interface
To port the interface, a simple copy and paste will be enough. Yes, it’s that simple!
Step 5: iPhone Adjustments
The original application size doesn’t match the iPhone size, so the first thing to do is change the background size to fit the stage.
Step 6: Class File
Copy and paste the class file to the source folder, no changes need to be made to this file.Step 7: Document Class
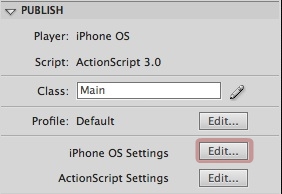
Remember to add the class name to the Class field in the Publish section of the Properties panel.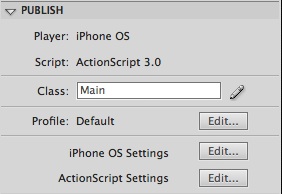
Step 8: Test for Errors
You can now test your movie to see if everything works as intended.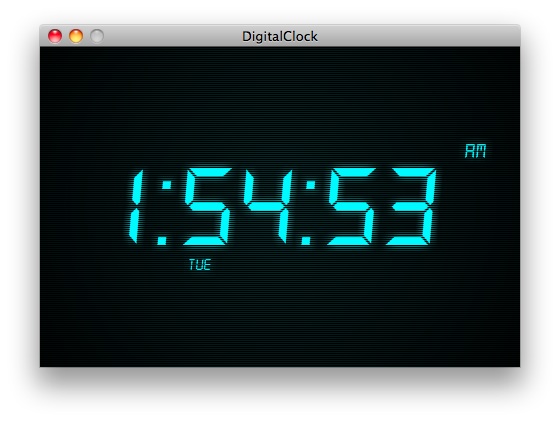
Step 9: iPhone OS Settings
Here comes the part you’re interested in; the iPhone part.Now you have a perfectly working Flash movie, it’s time to convert it to an iPhone application. Go to the Properties panel, Publish section and press the iPhone OS Settings button.
Step 10: General
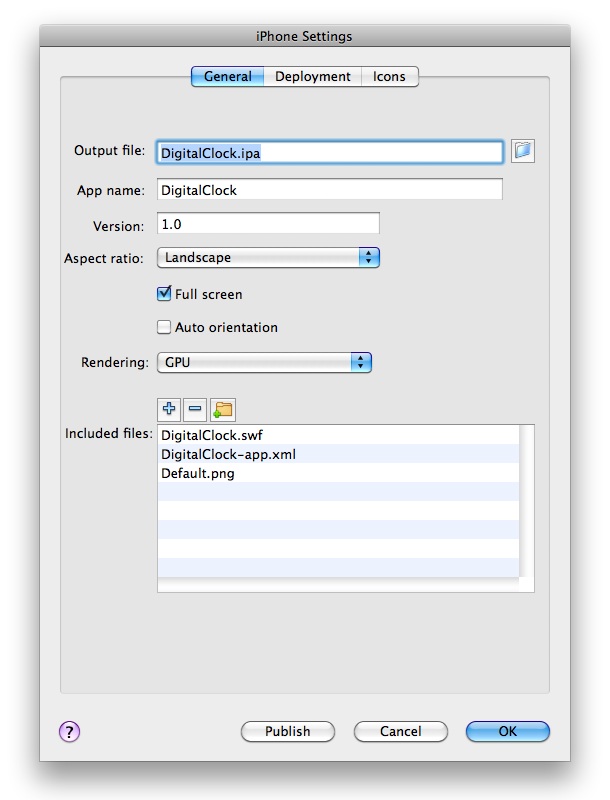
- Output File: The name of the ipa file that will be created, this can be whatever you want.
- App Name: The name that will be shown in your iPhone below the icon.
- Version: The current version of the application; you need to edit this on every test for iTunes to update the app succesfully.
- Aspect Ratio: The view mode of your app.
- Full Screen: Hides the top info bar (signal, bluetooth, wifi, battery, etc).
- Auto Orientation: Uses the accelerometer to change the orientation without writing code.
- Rendering: A very important option, using the gpu for rendering in complex graphics applications will highly increase the performance.
- Included Files: The files to be included with your app. If you are loading content from an XML, TXT or any other source you should add those files here.
Step 11: Launch Image
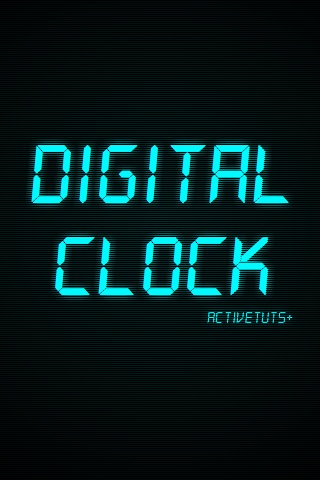
The image must be 320×480 it doesn’t matter if you’re working in landscape mode.
Step 12: Deployment

Step 13: Certificates
There are three different kinds of certificates. The first is the Apple Worldwide Developer Certificate (WWDC). This certificate is compiled alongside one of the other two certificates: either a Developer certificate or a Distribution certificate. These are used for testing applications and deploying to the Apple Store, respectively.Step 14: Provisioning Profile
The Provisioning Profile is basically a file that states which application we’re testing and on which devices can we test it.Step 15: App ID
An Identifier of your application, each application ID is required to have its own unique namespace that looks something like com.yourcompany.YourApp. This is also generated in the developer program site and included in your provisionig profile.Step 16: Deployment Type
Select an option depending on the kind of certificate and provisioning profile you’re working with. A Developer Certificate can be used for Quick Publishing and a Distribution Certificate is needed for deployment, using this kind of certificate will create an app ready to be submitted to the app store.Step 17: Icons
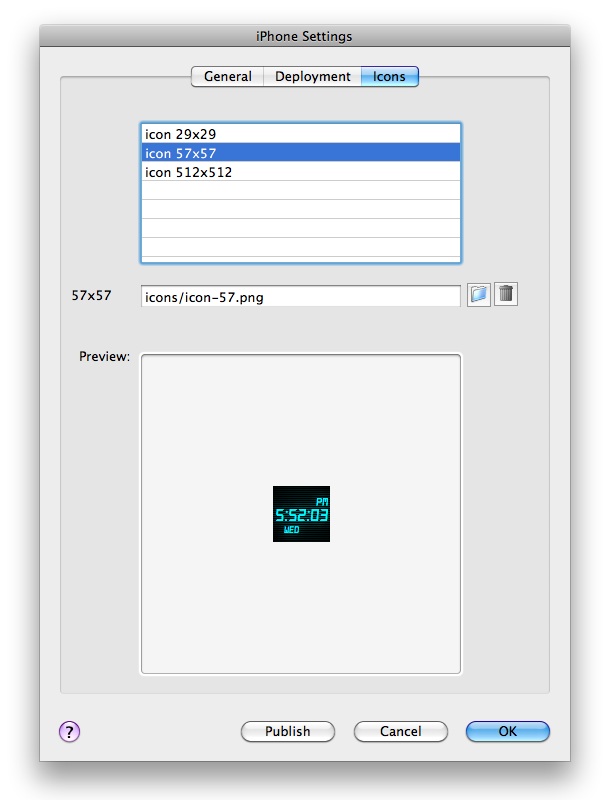
Three sizes of icons must be used 29x29px, 57x57px (this is the icon shown in the device) and 512x512px. Don’t worry about the round corners, iTunes will automatically generate them.
Step 18: Publish
When you’re done filling the settings press the Publish button, a progress bar will appear showing the remaining time. The time it takes depends on your application and the files included. Also, more time is needed when publishing for deployment.Step 19: Device Testing
Sync your iPhone and get ready to run your new app!
Step 20: Submit App

Conclusion
Now you know how easy it is to develop iPhone applications using Flash Pro CS5, start making your own!I hope you liked this tutorial, thank you for reading!
http://active.tutsplus.com/tutorials/mobile/flash-for-iphone/
Creating a Hello World iPhone Application Using Flash CS5
This tutorial will teach you how to create a simple HelloWorld iPhone Application using Flash CS5 and have it exported and installed on your device for testing purposes. This tutorial does not assume any AS3 knowledge as no ActionScript is required to export or install the application on your iPhone.Exporting an iPhone application can be a lengthy process for a first timer as it will require you to generate a valid certificate and a provisioning profile from Apple and then have it all configured in your application and on your device. We will try to provide you with all the resources you need to be able to achieve all the needed certificates.
Basic Requirements to Create an iPhone Application using Flash
In order to be able to create an iPhone Application using Flash you will need the following:- Flash Professional CS5 or higher - Previous versions of Flash CS cannot be used to make iPhone Applications.
- iTunes - iTunes is needed to get your iPhone UDID, it is also needed to install the Provisioning Profile and your application on your iPhone.
- A $99 dollar iOS Developer Program membership - This is necessary to generate the certificate and provisioning profile required to export your iPhone application. Without a valid certificate you will not be able to export your application, and without a profiling file you will not be able to test your application of your iPhone.
Create a Hello World iPhone Application
We are going to start off by creating a very simple Hello World Application, our application will not do anything other than display the message "Hello World" on the screen.Start off Flash CS5, go through File>New and select iPhone OS as the type of file you want to create, click on OK when done.

Once you movie is create you will have to save it, go through File>Save and save your movie anywhere on your computer. Name your flash file as HelloWorld.

Inside this movie you can put anything just for the sake of seeing it work on the iPhone, we suggest that you grab the Text Tool and write Hello World on the stage.

The content of our HelloWorld app is ready, we now need to acquire a certificate and provisioning profile from Apple for our application.
Acquiring the Developer Certificate
You can test your movie inside the Flash authoring tool by going through Control>Test Movie and you should be able to see your movie running, but if you want to test your application on an actual iPhone or if you want to submit your application to the iTunes Store you will have to export your application using a valid certificate and a provisioning profile.You only need to have one certificate for all your applications as it is needed to identify you as an authorized developer, while you will need a provisioning profile for each application as it will have application specific details and testing device specific details.
The first step to acquire your certificate would be to subscribe the Apple iOS Developer Program. this will require you to make a $99 payment and it's valid for a year.
You must subscribe to the Apple iOS Developer Program to acquire a valid certificate for your application.
Once you are a member of the iOS Developer Program you must generate a certificate for your program. For Mac users this is a straight forward process explained clearly on Apple's website. Windows users on the other hand will not find any instructions on how to do this on Apple's website and must instead follow the instructions on Adobe's website.Regardless of the platform you use, you will have to convert the certificate your acquire from Apple's website into a format a P12 file so that Flash understands it. To do this you must follow the instructions on Adobe's website regardless of the platform you use.
Once you have your certificate ready you will have to save it somewhere on your desktop until we generate our provisioning profile.
Acquiring the Provisioning Profile
The next step is to acquire a provisioning profile for your application, there are two types of provisioning profiles, one for development (testing purposes) and the other one is for distribution (submitting your application to the iTunes Store). We are going to create one for testing purposes as that is the purpose of this tutorial.You can acquire your provisioning profile from the iOS Provisioning Portal. This will involve doing the following:
This will require you to do the following:
- Creating an application ID.
- Creating a device ID for devices you wish to test.
- Creating a provisioning profile.

Use the keyboard shortcut to copy this reference then head back to the Apple to get your Provisioning Profile.
You should not find it difficult to follow the instructions on the iOS Provisioning Portal to acquire your provisioning profile, once you have your Provisioning Profile file ready save it somewhere on your machine and move to the next section.
Exporting the iPhone Application
Once you have all your certificates ready, you can export your iPhone application by going through File>iPhone OS Settings, from here you can configure your application and locate your certificates in order to generate the app. The General tab has some self-explanatory settings, the one you need to worry about for our purposes is the Deployment tab. From here you can select your certificate and provisioning profile. You may also configure the icons for your application from the Icon window if you want to do that.
Once you are ready simply click on the Publish button to create your iPhone application, this should take a bit longer than your regular Flash movies so do not worry if takes a few minutes to complete the publishing process.
Installing the Application on your iPhone
The final stage of this tutorial will be completed in iTunes, first thing you will have to do is install the provisioning profile on your iPhone. To do this go through File>Add To Library and browse for your provisioning file. Once you add it to the library you will have to Sync your phone. This should install the provisioning file on your device. To check on your iPhone if the Profile has been installed you can go through Settings>General>Profiles (On your iPhone) and look for the profile there.Once you have the profile installed you can add your application to your iTunes library by dragging it directly there or going through File>Add To Library. Again, sync your iPhone with your library to get the application on your device.
You should hopefully have your application installed on your iPhone at this stage.
If you have any troubles you should review the iPhone FAQ on Adobe's website and the instructions on Apple's iOS Dev Center. You should also feel free to post any comments or questions you have at the Republic of Code Forum.
- End of Tutorial
Related link
http://ipodtoucher55.blogspot.com/2010/06/how-to-create-iphone-apps-in-flash-cs5.html
http://active.tutsplus.com/tutorials/mobile/flash-for-iphone/
http://www.republicofcode.com/tutorials/flash/iphone/
http://www.adobe.com/support/flash/downloads.html
http://www.adobe.com/devnet/logged_in/abansod_iphone.html
http://download.macromedia.com/pub/flash/updates/11/ios/win/PFI_WIN_2_0_1_12640.zip
http://download.macromedia.com/pub/flash/updates/11/11_0_2/win/FlashCS5_Update.zip
http://www.megaupload.com/?d=7MHDAUC9
http://blancer.com/tutorials/89856/porting-an-application-to-iphone-using-flash-cs5/
http://vimeo.com/groups/creativeapps/videos/9224055
http://prodesigntools.com/how-to-create-adobe-flash-pro-cs5-apps-for-apple-iphone-ipad.html
http://cs5.org/?p=359
http://hpapplication.com/2010/10/create-iphone-apps-using-adobe-flash-cs5/
http://www.mikechambers.com/blog/2010/04/20/on-adobe-flash-cs5-and-iphone-applications/
http://wiki.forum.nokia.com/index.php/Geolocation_in_Flash_Lite_4
